Follow Me On Social Media!

Polar Bear Paws Candy: Irresistibly Sweet & Creamy Delight
Introduction to Polar Bear Paws Candy
Embarking on the journey of creating polar bear paws candy is like unwrapping a delightful present that combines sweet nostalgia with a creative twist. Imagine a treat that captures the essence of winter fun while evoking memories of family gatherings and cozy nights. This candy is not just delicious; it’s a whimsical experience that brings out your inner child. Whether you’re preparing for the holiday season or simply looking for a sweet snack to brighten your day, polar bear paws candy is a delightful choice that will have your taste buds dancing!
What makes Polar Bear Paws Candy so special?
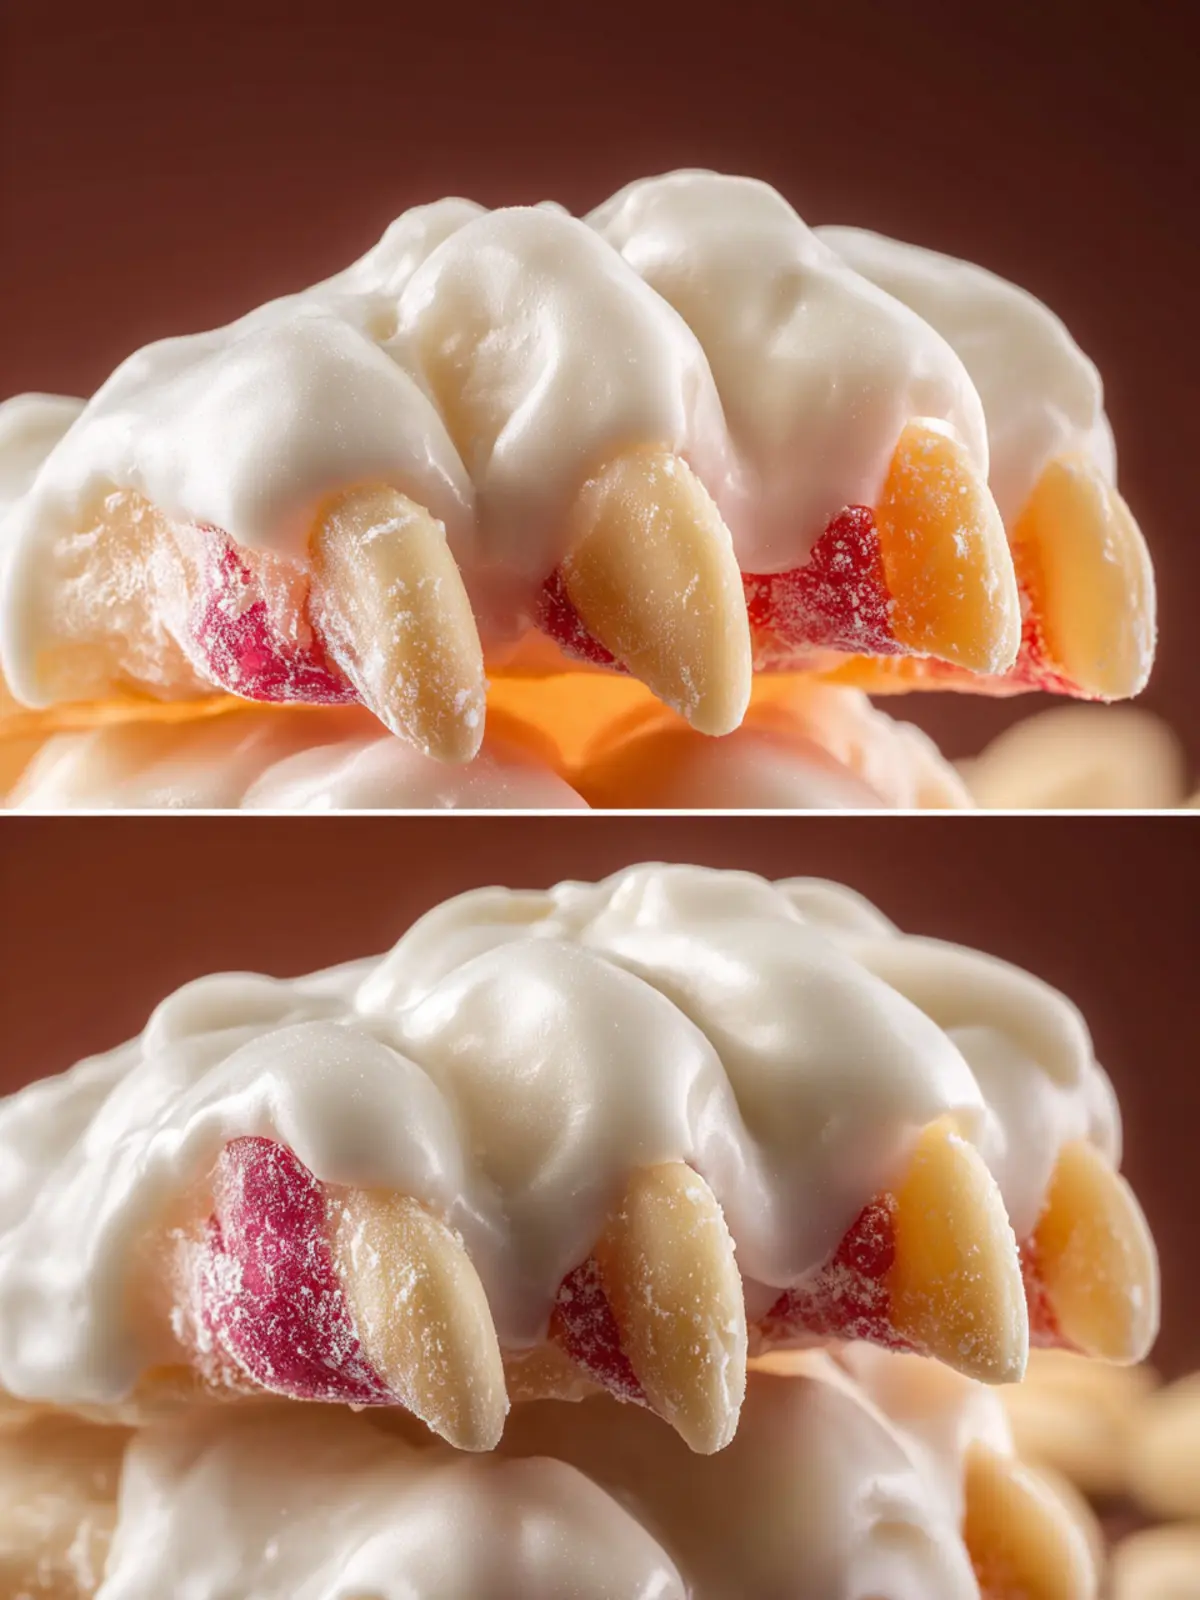
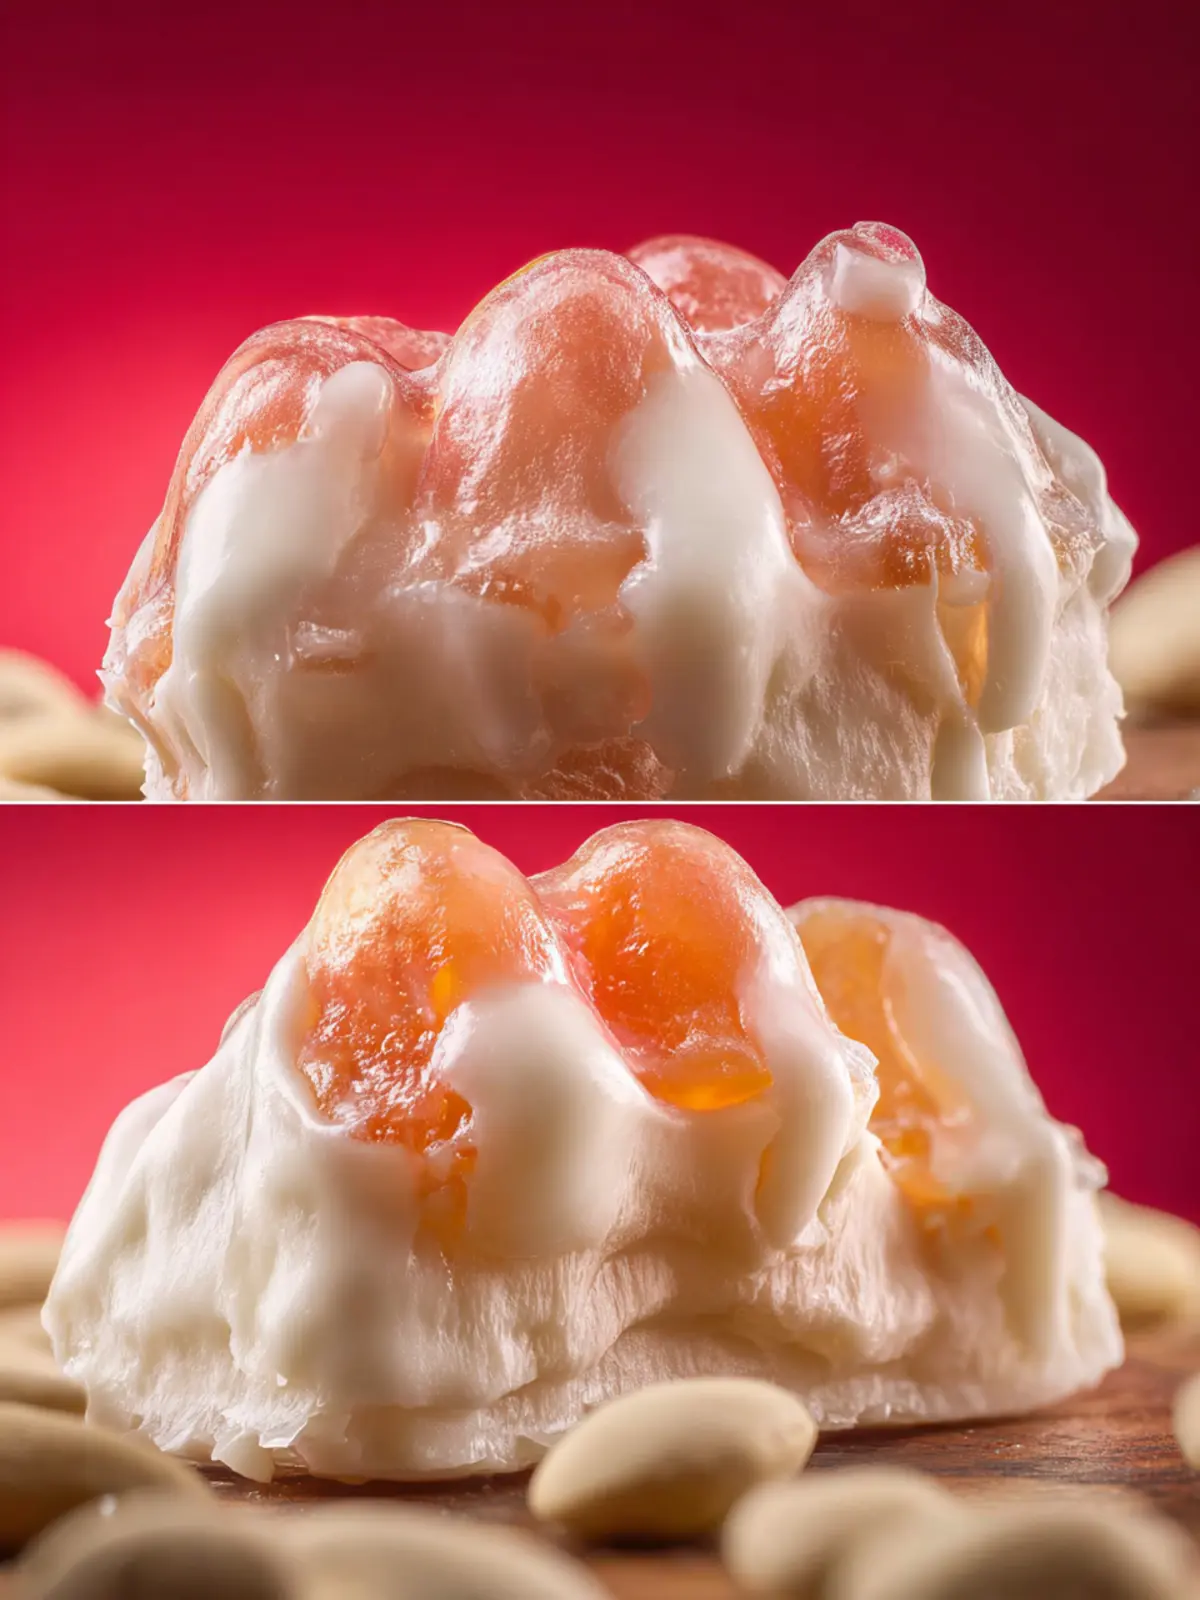
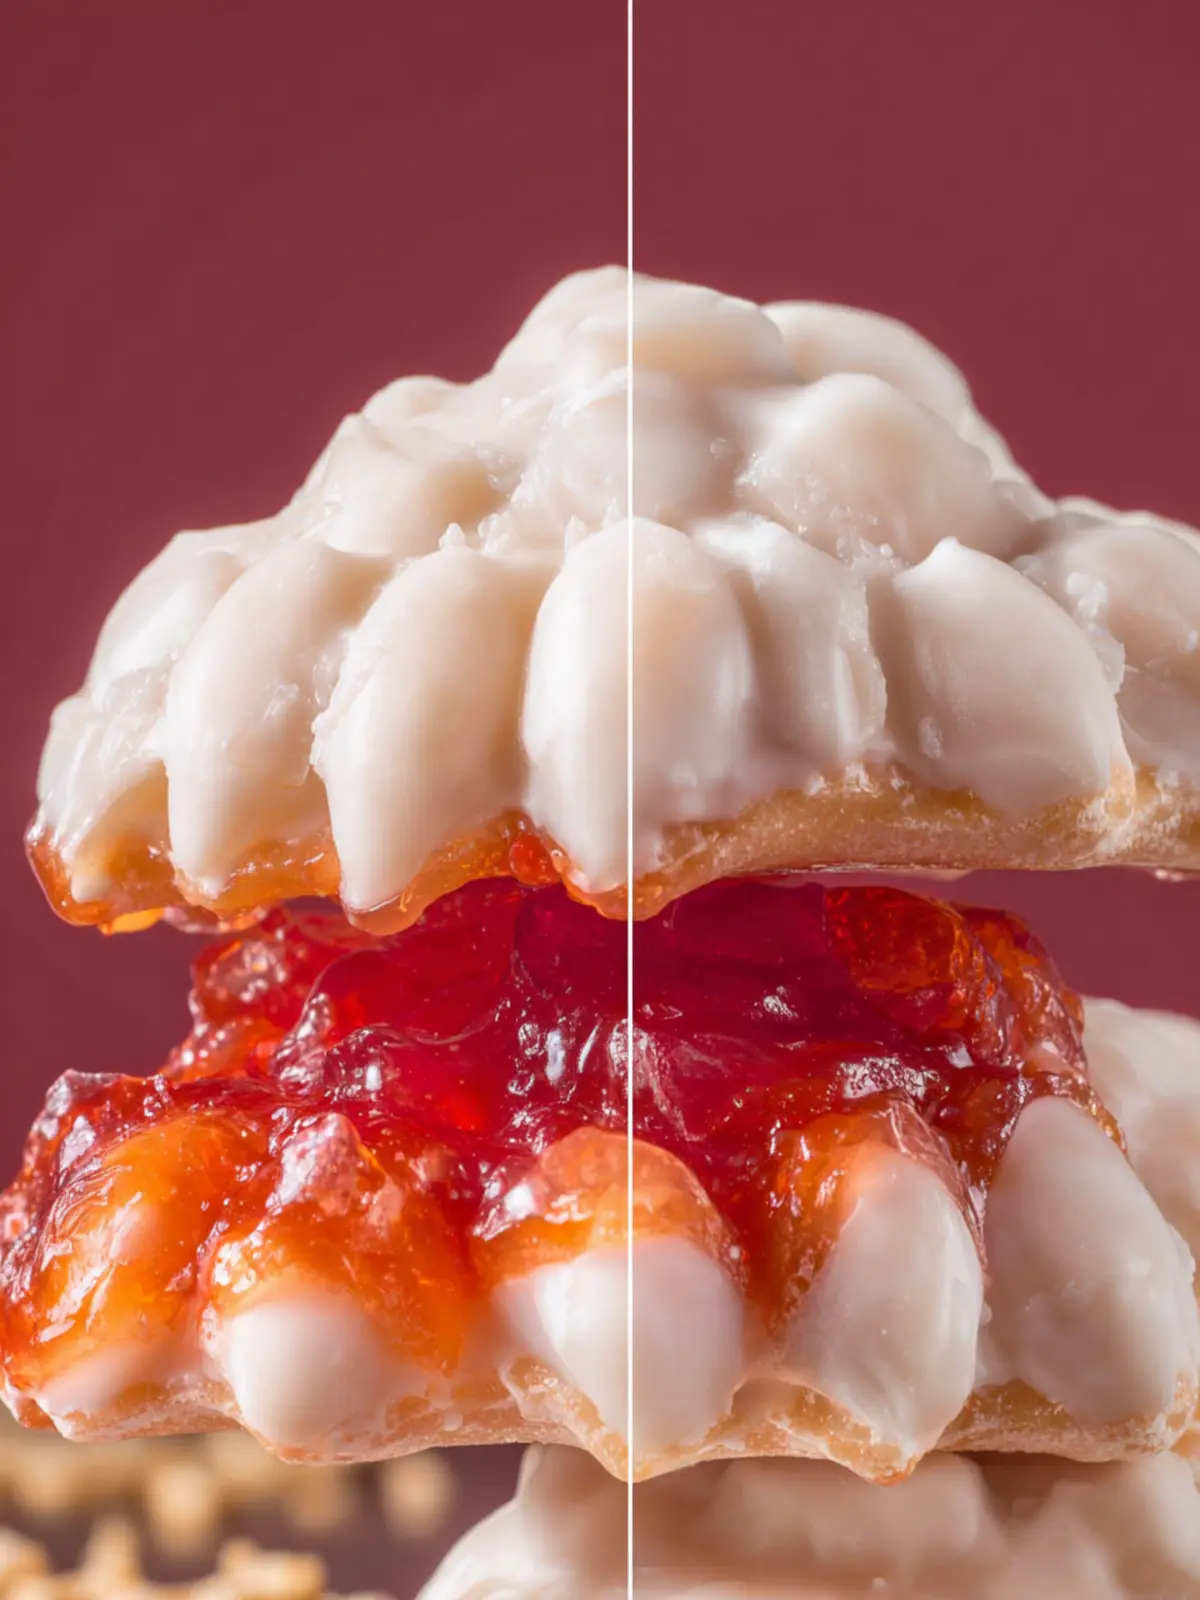
The unique charm of polar bear paws candy lies in its combination of tempting flavors and comforting textures. This candy masterpiece is often characterized by a luscious blend of creamy white chocolate entwined with crunchy peanut butter and chewy marshmallows, resembling the adorable paw of a polar bear.
Here are a few reasons why this treat truly stands out:
-
Easy to Make: With just a handful of simple ingredients, creating polar bear paws candy is surprisingly straightforward. Even if baking isn’t your forte, you’ll find that this no-bake recipe is accessible to all skill levels.
-
Customizable: You can make this candy your own by adding your favorite mix-ins. Whether it’s crushed pretzels for a salty crunch or sprinkles for an extra pop of color, let your creativity run wild!
-
Perfect for Gifting: Wrapped neatly in cute packaging, this candy becomes a sweet gift for friends, family, or coworkers—perfect for holidays, birthdays, or just because.
-
Family Fun: Making polar bear paws candy can be a fun activity to involve your kids or friends. The simple steps and hands-on process encourage bonding and laughter in the kitchen.
As you gear up to create your own batch, prepare for a delicious treat that is sure to bring joy and a sense of accomplishment. Dive into the recipe with enthusiasm, and let this cozy confection work its magic!
Key Ingredients for Polar Bear Paws Candy
Creating polar bear paws candy is a delightful way to indulge your sweet tooth while crafting a festive treat. Each ingredient plays a vital role in bringing this charming candy to life, blending flavors and textures that will make you want to share it with friends and family.
Chocolate
Chocolate is the star of this recipe, providing a rich and creamy base. I prefer using milk chocolate for its smooth sweetness, which pairs perfectly with the other ingredients. If you’re a dark chocolate lover, feel free to swap it in for a more intense flavor.
Peanut Butter
Creamy peanut butter adds a savory richness to polar bear paws candy. Opt for natural peanut butter without added sugars or oils for the best balance of flavor. It creates a delightful contrast with the sweetness of the chocolate.
Candy Corn
Candy corn adds a fun twist with its vibrant colors and chewy texture. It not only enhances the visual appeal but also introduces a nostalgic touch that reminds us of childhood treats.
Rice Cereal
Using rice cereal contributes a lovely crunch to the candy. It helps lighten the mixture, giving each bite a satisfying texture that’s sure to please. Make sure to choose a classic, unsweetened variety to keep the focus on the flavors.
Almonds
Almonds provide a delightful crunch, along with a nutty flavor that complements the sweetness of the other ingredients. Whether you choose whole almonds or slivers, they add sophistication to your candy creation.
By combining these ingredients, you’ll whip up a batch of polar bear paws candy that not only tastes great but also brings a festive spirit to your gatherings!
Why You’ll Love This Recipe
Making polar bear paws candy is not just about creating a delightful treat; it’s about crafting memories that will linger long after the last chocolate has melted in your mouth. With each step, you’ll find a blend of textures and flavors that will have you reaching for more just as you delight in sharing them with family and friends.
Unleashing your inner chocolatier has never been easier! You only require a few simple ingredients to create these charming little masterpieces, making them the perfect addition to any festive gathering or cozy evening spent at home. Imagine the joy of inviting your friends over for a movie night, only to surprise them with a platter of these sweet, chocolate-coated confections that not only look adorable but taste absolutely divine.
Here’s what makes making polar bear paws candy especially rewarding:
- Customization: You can tweak the ingredients or proportions to match your taste.
- Fun to Make: The assembly process is not only straightforward but also fun, perfect for involving kids or hosting a crafting day.
- Perfect for Gifting: These candies are a heartfelt way to share a little love during special occasions!
Join me on this delicious journey to create a treat that’s as fun to make as it is to enjoy!
Variations for Polar Bear Paws Candy
Creating polar bear paws candy is a delightful and versatile endeavor, allowing you to customize the flavors and textures based on your preferences. This candy’s adorable presentation and delectable taste make it a festive treat, but you can easily give it a unique twist with a few simple variations.
Add Different Nuts
While the classic recipe often calls for peanuts or pretzels, experimenting with different nuts like almonds or cashews can elevate your polar bear paws candy to the next level. Toasting the nuts beforehand adds a lovely depth of flavor!
Switch Up the Chocolate
Milk chocolate is typically used, but have you considered dark or white chocolate? Each variety brings its own rich sweetness, changing the dynamics of the candy’s taste. For added fun, try using flavored chocolates, like mint or orange, to impart a surprise element in every bite.
Incorporate Dried Fruits
Get creative by adding dried fruits such as cranberries, raisins, or even chopped apricots into the mix. They provide a chewy contrast that perfectly balances the crunch of the nuts and pretzels, making your polar bear paws candy even more enjoyable.
Flavor Infusions
A hint of vanilla or almond extract can work wonders. Just a touch mixed into the melted chocolate can transform the entire flavor profile, making it even more irresistible.
With these variations, your polar bear paws candy will not only be a tasty treat but also a memorable one that guests will be asking for more!
Cooking Tips and Notes for Polar Bear Paws Candy
Creating polar bear paws candy is not just a treat; it’s an experience that brings warmth and nostalgic joy into your kitchen. As you embark on this delightful confectionery journey, keep the following tips in mind to ensure success.
Choose Quality Chocolate
The base of your polar bear paws candy relies heavily on the quality of chocolate you use. Opt for good-quality milk or white chocolate for a creamy finish. You can also experiment with flavored chocolates for a unique twist. If you’re melting larger chocolate bars, chop them into small pieces for even melting.
Perfectly Measure Ingredients
Accurate measurements lead to consistent results. Use a kitchen scale for the most precise measurements, especially for ingredients like peanut butter and powdered sugar. A sticky consistency is key, so adjust the peanut butter if needed.
Use a Silicone Mold
For beautiful shapes and easy release, consider using silicone molds. These molds allow the chocolate to cool and set without sticking, giving your polar bear paws candy a professional look. If you don’t have molds, parchment paper will do the trick!
Keep Your Workspace Clean
When dealing with melting chocolate and sticky ingredients, a tidy workspace can make a world of difference. Have all your tools and ingredients ready before you start to ensure a smooth process. Trust me, it’ll save you from potential messes!
Don’t Rush the Cooling Process
Allow your polar bear paws candy to cool completely at room temperature or in the fridge. Rushing this step can lead to soft or misshapen candies. Patience is essential for achieving that perfect bite.
With these tips in hand, you’re set to craft irresistible polar bear paws candy that will delight friends and family alike! Happy cooking!
Serving Suggestions for Polar Bear Paws Candy
When you whip up a batch of polar bear paws candy, you’re not just going for a treat; you’re diving into a delightful world of flavors and textures that evoke both nostalgia and joy. Imagine sharing these chewy, chocolatey morsels during a cozy movie night with friends or surprising your family with a special snack after school—these little bites of goodness are more than just candy; they’re perfect for any occasion.
Sweet Treat for Gatherings
-
Holiday Parties: A tray of polar bear paws candy works wonders as a festive centerpiece. Their playful shape and rich flavor are bound to capture the attention of guests, whether you’re hosting a winter celebration or a birthday bash.
-
Movie Night: Snuggle up with friends and pair your polar bear paws candy with popcorn for the ultimate movie night experience. The combination of sweet and salty is irresistible!
Fun for All Ages
-
Kids’ Treats: Packed with delight, give these candies as party favors or include them in lunchboxes. Children love the texture and taste—they’ll be asking for more.
-
Adult Indulgence: Don’t forget how enjoyable these are for adults, too! Present them alongside a warm cup of coffee or tea, and watch the smiles spread around.
Eco-Friendly Packaging
If you’re mindful of the environment, consider using eco-friendly bags or boxes to package your polar bear paws candy. A small touch like this not only preserves freshness but also adds a personal flair that your friends and family will appreciate.
In every scenario, polar bear paws candy shines bright, becoming a beloved addition to your culinary repertoire. So, how will you serve yours?
Time Breakdown for Polar Bear Paws Candy
Making polar bear paws candy is not just about the delicious result; it’s a fun process that brings a hint of joy to your kitchen. Here’s how to organize your time effectively for this treat.
Preparation Time
The polar bear paws candy preparation includes gathering all your ingredients and preparing your workstation, which typically takes about 15 minutes.
Cooking Time
Cooking these delightful snacks doesn’t take long; you’ll be on and off the stove in around 20 minutes.
Total Time
In just about 35 minutes, you can have your delicious polar bear paws candy ready to enjoy. This quick turnaround makes it perfect for last-minute cravings or surprise guests!
Nutritional Facts for Polar Bear Paws Candy
Creating the delightful polar bear paws candy is not just about satisfying your sweet tooth; it’s also handy to know what you’re indulging in. This sweet treat blends flavors and textures to create a tasty snack for all ages. Let’s dive into the nutritional facts to see how this candy fits into your overall diet.
Calories
Each serving of polar bear paws candy brings you about 150 calories. This little indulgence is perfect for when you crave something sweet without going overboard.
Protein
You can expect about 2 grams of protein in each serving. While it’s not a protein powerhouse, it does offer a little boost thanks to the addition of nuts or chocolate typically used in the recipe.
Sodium
Sodium content in this treat is relatively low, averaging around 30 milligrams per serving. This makes polar bear paws candy a great option for those monitoring their salt intake while still enjoying a delightful dessert.
Incorporating polar bear paws candy into your snack rotation can be a fun and tasty way to share delightful flavors with friends and family!
FAQs about Polar Bear Paws Candy
When it comes to crafting the perfect Polar Bear Paws Candy, there are a few common questions that pop up, especially for those who want to refine their treat-making skills. Let’s dive into some frequently asked questions that might help elevate your candy-making game.
How can I make my Polar Bear Paws Candy more flavorful?
To enhance the flavor of your Polar Bear Paws Candy, consider adding a splash of vanilla extract or a pinch of sea salt. These subtle additions can brighten the sweetness of the candy and create a well-rounded flavor profile. You might also explore infusing your melted chocolate with different flavors, such as almond or peppermint, for a unique twist.
Can I use different nuts in Polar Bear Paws Candy?
Absolutely! While the classic recipe features peanut or almond, feel free to experiment with other nut varieties. Cashews, macadamia nuts, or walnuts could add an unexpected crunch and flavor dimension to your Polar Bear Paws Candy. Just ensure the nuts are roasted for extra flavor, and chop them to a manageable size before mixing them into the candy mixture.
How do I store Polar Bear Paws Candy for freshness?
To keep your Polar Bear Paws Candy fresh, store it in an airtight container at room temperature for up to two weeks. If you live in a particularly warm climate, consider refrigerating the candy to prevent melting. For longer storage, you can freeze them, just be sure to layer them with parchment paper to avoid sticking, and use a freezer-safe container. This way, you’ll have a delightful treat ready whenever the craving strikes!
Conclusion on Polar Bear Paws Candy
Creating polar bear paws candy is not just about whipping up a delightful treat; it’s about crafting memories. This recipe is perfect for cozy gatherings or festive celebrations, bringing a sweet touch that everyone will adore. The combination of creamy peanut butter, rich chocolate, and crunchy pretzels makes each bite irresistibly satisfying. Share these delicious creations with friends and family, or keep them for yourself—they’re too good to resist! With easy ingredients and quick preparation, you’ll be making polar bear paws candy all year round. Enjoy the smiles that come with this scrumptious sweet treat!
Print
Chocolate Covered Caramel Peanut Clusters
- Total Time: 1 hour 30 minutes
- Yield: 24 clusters 1x
- Diet: Vegetarian
Description
Delicious clusters of caramel and roasted peanuts, coated in smooth vanilla almond bark.
Ingredients
Scale
- 11 ounces soft caramels
- 3 Tablespoons heavy cream
- 1 Tablespoon butter
- 1 1/4 cups roasted peanuts
- 10 ounces vanilla almond bark
- 1 Tablespoon coconut oil
Instructions
- In a medium saucepan, add the unwrapped soft caramels, heavy cream, and butter.
- Place over medium heat and stir frequently until the caramels are fully melted and the mixture is smooth and uniform.
- Remove from the heat. Add the roasted peanuts and stir until they are evenly coated.
- Allow the mixture to cool for 20–25 minutes, stirring once halfway through to prevent the bottom from setting too quickly.
- Line a baking sheet with parchment paper or a silicone mat.
- Using a medium cookie scoop (1½ tablespoons), portion the mixture into mounds on the prepared sheet.
- The cooler the caramel is when scooped, the less the clusters will spread.
- Let the clusters cool completely until firm. To speed this up, place the baking sheet in the refrigerator or freezer.
- Place the vanilla almond bark (or candy coating) and the oil in a microwave-safe bowl.
- Heat in 20-second intervals, stirring thoroughly after each, until completely melted and smooth.
- Using a fork, dip each cooled cluster into the melted almond bark, letting excess coating drip off, then return it to the lined baking sheet.
- Once all clusters are coated, refrigerate again briefly if needed until the chocolate is fully set.
Notes
- This recipe can be refrigerated for a firmer texture.
- Adjust the cooling time based on your kitchen temperature.
- Prep Time: 15 minutes
- Cook Time: 15 minutes
- Category: Dessert
- Method: Stovetop and Microwave
- Cuisine: American
Nutrition
- Serving Size: 1 cluster
- Calories: 150
- Sugar: 13g
- Sodium: 50mg
- Fat: 9g
- Saturated Fat: 5g
- Unsaturated Fat: 3g
- Trans Fat: 0g
- Carbohydrates: 17g
- Fiber: 1g
- Protein: 2g
- Cholesterol: 10mg