Follow Me On Social Media!


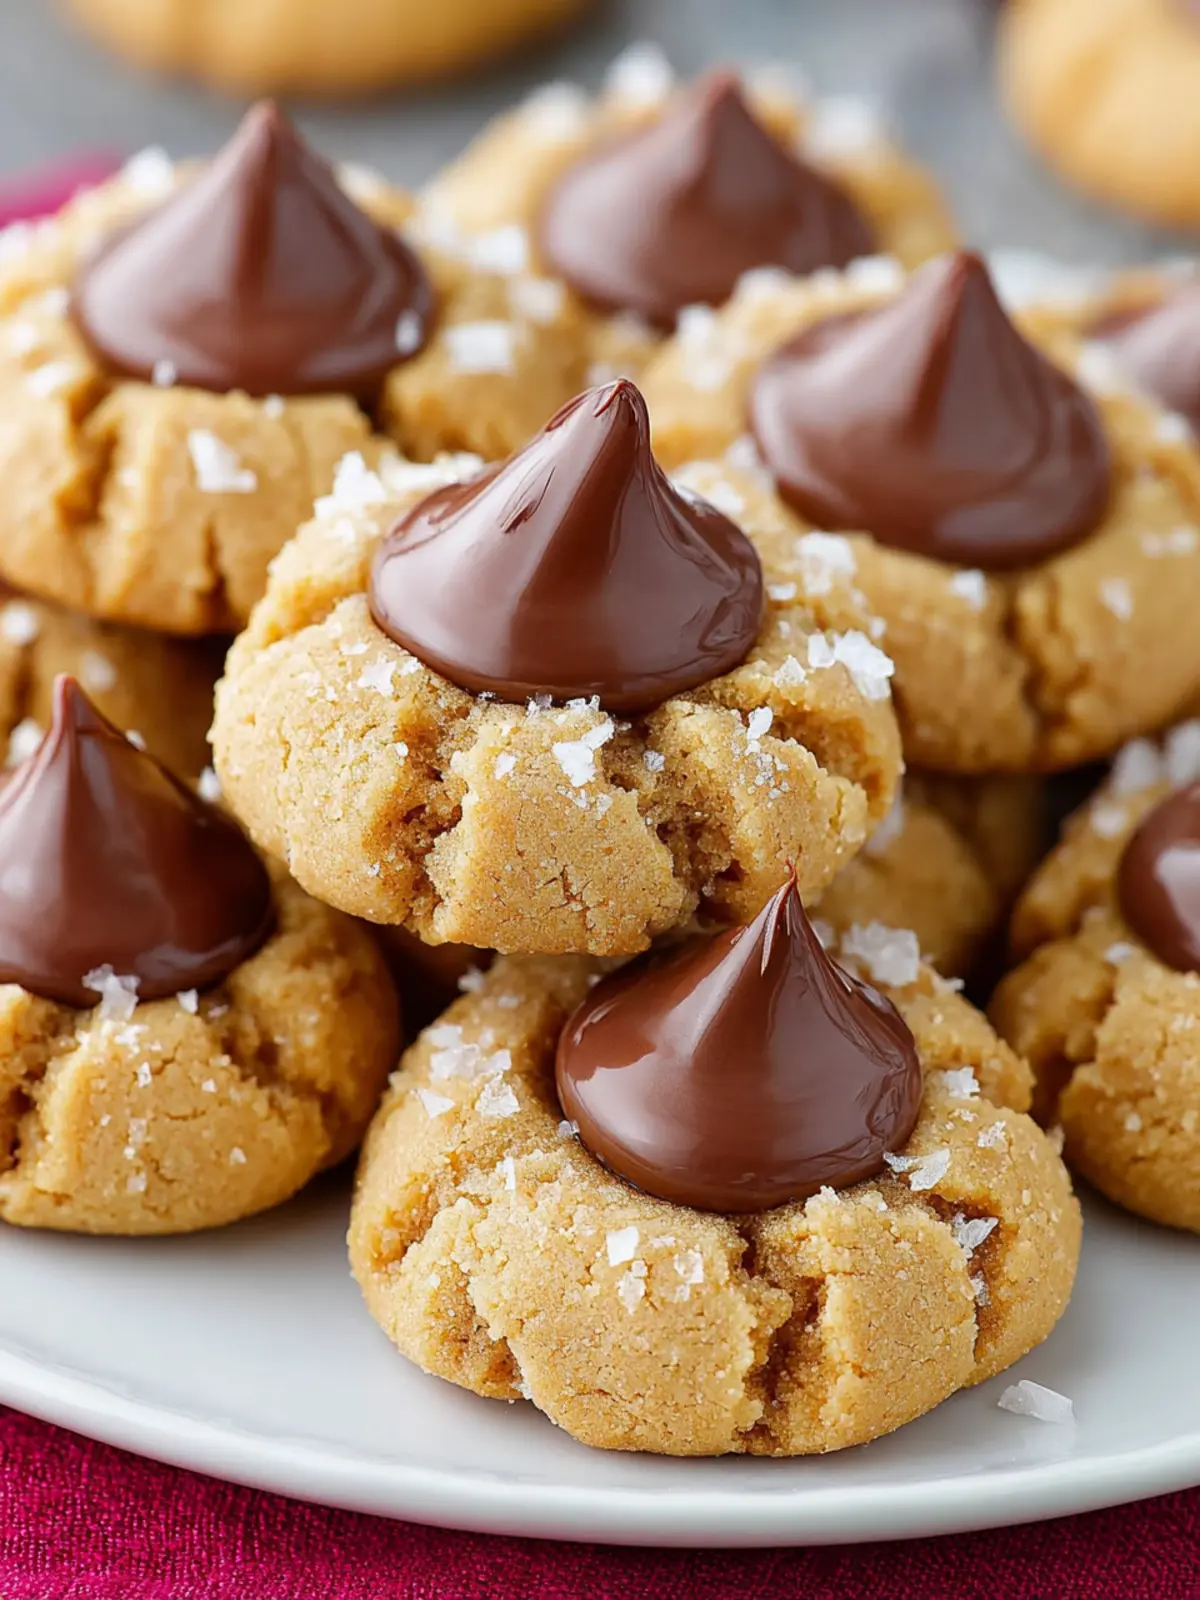
Peanut Butter Blossoms: Irresistibly Gooey Family Favorites
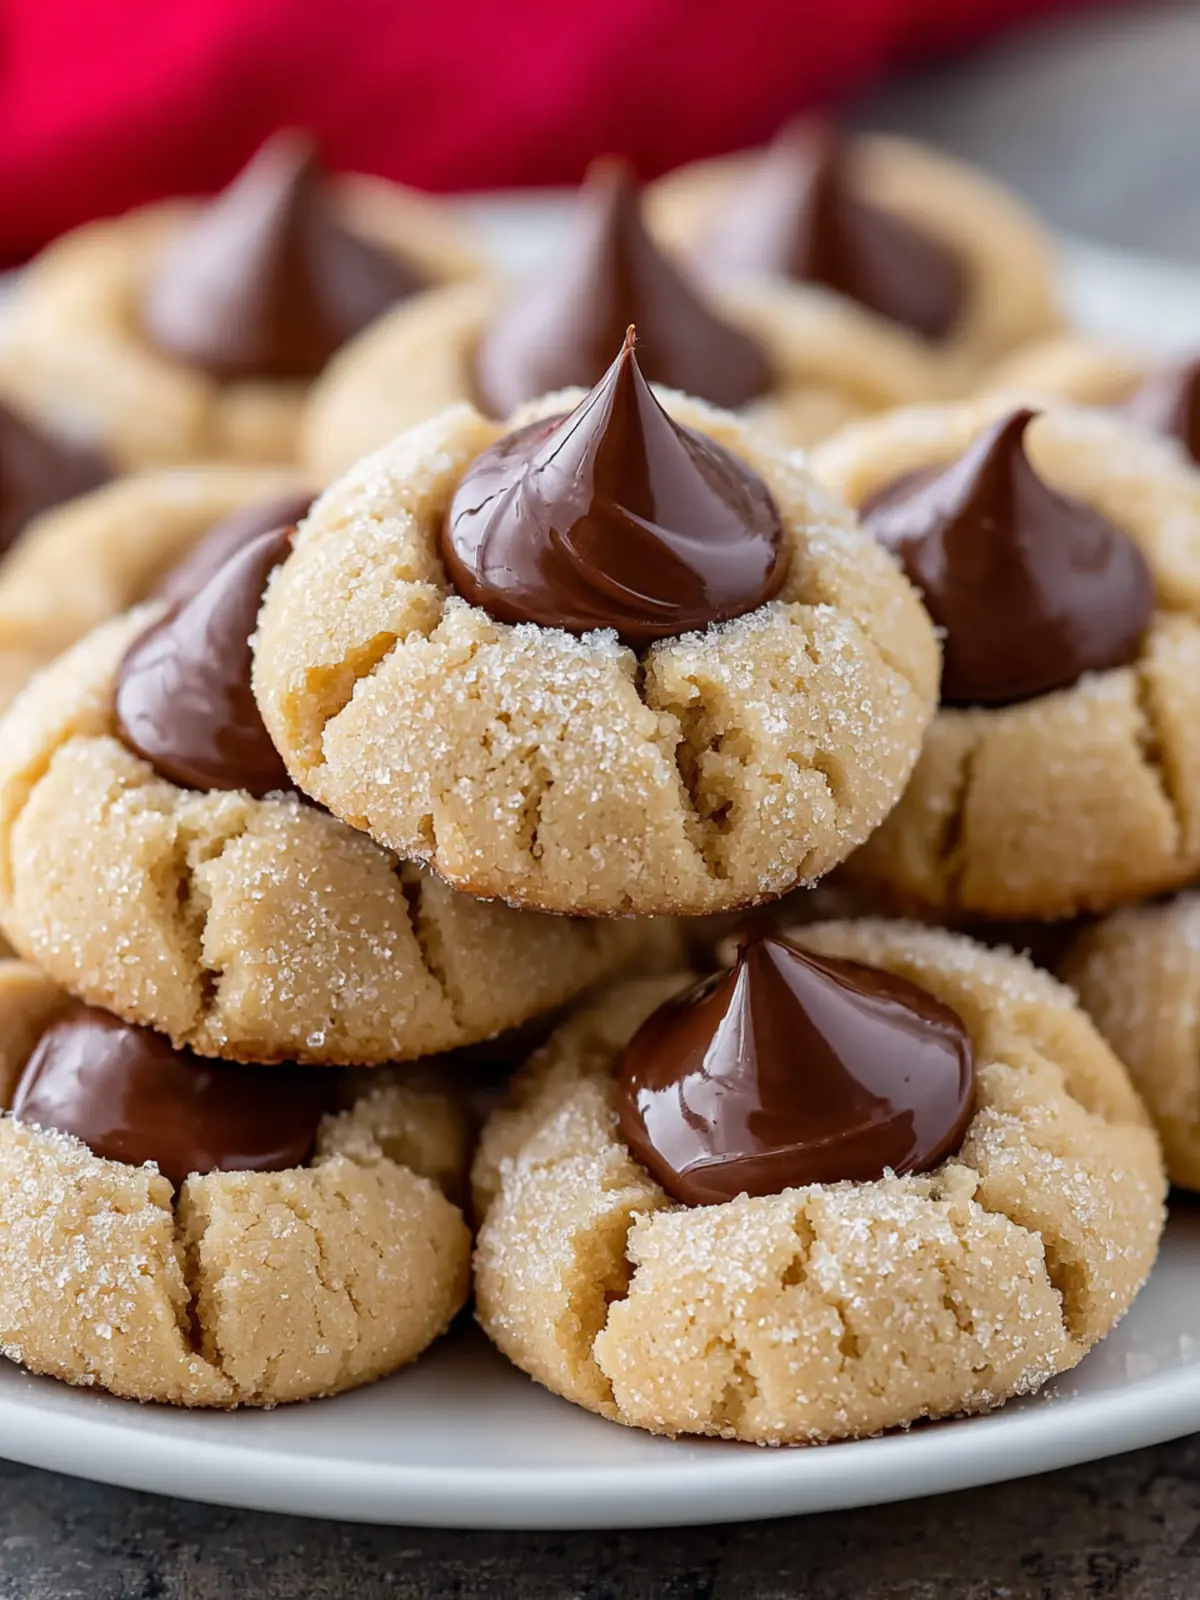
Introduction to Peanut Butter Blossoms
There’s something truly special about peanut butter blossoms that makes them a staple in many households. Imagine walking into a cozy kitchen filled with the delightful aroma of freshly baked cookies, a warm hug of nostalgia that takes you back to your childhood. These delectable treats are not just sweets; they embody moments of joy and togetherness, often served during family gatherings or celebratory holidays.
The charm of peanut butter blossoms lies in their delightful combination of flavors and textures. At first bite, you’re met with the creamy, rich peanut butter, only to be surprised by the melt-in-your-mouth chocolate kiss nestled on top. This perfect union of sweet and savory creates an irresistible dessert that appeals to both kids and adults alike. It’s a simple yet satisfying cookie that can easily become a favorite in any baking repertoire.
What makes Peanut Butter Blossoms a classic favorite?
These delightful cookies are celebrated for several reasons:
- Simple Ingredients: The beauty of peanut butter blossoms is that they require minimal, readily available ingredients. Usually, you’ll find essentials like peanut butter, sugar, flour, and of course, chocolate kisses.
- Versatile and Adaptable: While the classic version features Hershey’s Kisses, you can easily experiment with different chocolates or even swap in peanut butter cups for a unique twist.
- Nostalgic Flavor: For many, these cookies evoke childhood memories, prompting smiles and stories as you enjoy them. The combination of peanuts and chocolate is truly timeless.
- Easy to Make: Even if you’re a beginner in the kitchen, the straightforward steps will boost your confidence. Best of all, the end result is sure to impress friends and family.
Nothing beats the moment you take your first bite of a peanut butter blossom. That perfect balance of chewy cookie and sweet chocolate is simply unforgettable. With this recipe, you’ll not only craft delicious cookies but also create heartwarming memories to cherish for years to come.
Key Ingredients for Peanut Butter Blossoms
Peanut butter blossoms evoke fond memories of childhood kitchens where the smell of warm cookies brought families together. These delightful treats are not only a classic favorite but also incredibly simple to make. Here’s a closer look at the key ingredients that create those irresistibly chewy cookies topped with a delightful chocolate kiss.
-
Peanut Butter: The star ingredient in peanut butter blossoms is, of course, the creamy or crunchy peanut butter. I recommend using a natural variety for a richer flavor and fewer additives. It’s essential to make sure your peanut butter is stirred well to incorporate any oil that may have separated.
-
Granulated Sugar: This adds sweetness and helps to create that delightful crunch on the outside of the cookies. The balance of sugar with the savory peanut butter is what makes these blossoms so special.
-
Brown Sugar: I use light brown sugar for its hint of molasses flavor, which deepens the cookie’s taste. This ingredient also contributes to the chewy texture that we all love.
-
Eggs: Eggs act as a binder here, helping to hold everything together while adding moisture. They also provide the structure necessary for the cookies.
-
Baking Soda: This ingredient helps the cookies rise, giving them a light and fluffy texture that perfectly contrasts with the chocolate kiss on top.
-
Flour: All-purpose flour is the way to go for these cookies. It provides stability while keeping the dough soft and workable.
-
Chocolate Kisses: No peanut butter blossom is complete without the iconic chocolate kiss. Make sure to add them while the cookies are still warm for that ultimate melt-in-your-mouth experience.
Using these simple ingredients, you can create a batch of peanut butter blossoms that will surely bring smiles and satisfy sweet cravings!
Why You’ll Love This Recipe
Diving into the world of peanut butter blossoms is like unlocking a treasure chest of flavor and nostalgia. Each bite transports you back to cozy childhood kitchens, where the rich aroma of peanut butter cookies filled the air and the joyous anticipation of indulging in a sweet treat lingered long after the oven timer chimed.
Here’s why this recipe will become a staple in your home:
-
Perfect Combination: The marriage of rich peanut butter and sweet chocolate creates a delightful contrast that keeps you reaching for more. Whether you enjoy them with a glass of milk or as a post-dinner treat, these cookies hit the sweet spot every time.
-
Easy to Make: This recipe is straightforward and requires minimal ingredients, making it accessible even for those who are new to baking. You won’t need a kitchen full of gadgets; just some time, love, and an oven.
-
Customizable: While the classic version is always a hit, you can easily experiment with variations. Think about trying different types of chocolate or even adding a sprinkle of sea salt for that extra pop of flavor!
-
Perfect for Sharing: Peanut butter blossoms are ideal for gatherings or as a thoughtful gift. Their inviting look and irresistible taste make them a crowd-pleaser, ensuring they won’t last long on any dessert table.
Try making these cookies, and experience for yourself just how much love and joy they can bring into your day.
Variations of Peanut Butter Blossoms
Embracing the classic peanut butter blossoms recipe opens a delightful world of variations that can tickle your taste buds in unexpected ways. Picture this: a cozy afternoon spent in your kitchen, the comforting scent of warm cookies wafting through the air, and a delightful twist on a beloved favorite.
Chocolate-Dipped Peanut Butter Blossoms
For those who believe more chocolate is always better, consider dipping your peanut butter blossoms in melted chocolate after baking. This adds an extra layer of richness and makes for an indulgent treat. Simply melt chocolate chips and dip the cooled cookies halfway before letting them set on parchment paper.
Nutty Alternatives
If you want to jazz up your peanut butter blossoms, try swapping out the peanut butter for other nut butters like almond or cashew. Each brings its unique flavor profile, giving your cookies a delicious twist while maintaining that signature gooey center.
Seasonal Spices
Incorporating spices can take your cookies to the next level. Add a dash of cinnamon or nutmeg to the dough for a warm and inviting aroma. It’s especially perfect for fall gatherings or holiday celebrations!
Vegan Version
For a plant-based spin on your favorite treat, replace the egg with flaxseed meal or applesauce, and use a dairy-free chocolate for the center. These small adjustments ensure everyone can enjoy the magical experience that is peanut butter blossoms, no matter their dietary preferences.
Experimenting with variations doesn’t just satisfy cravings; it brings a personal touch to your baking adventures. Let your creativity shine!
Cooking Tips and Notes for Peanut Butter Blossoms
Baking peanut butter blossoms is like crafting little bites of nostalgia, each one evoking sweet memories of cherished holidays. To get the best results from your baking adventure, consider these helpful tips and notes.
Choose the Right Peanut Butter
The heart of your peanut butter blossoms is, of course, the peanut butter. I recommend using a high-quality, creamy variety without added sugar or oils. Natural peanut butter can also work, but be mindful that it may result in a slightly different texture.
Chill Your Dough
After mixing your dough, let it chill in the refrigerator for at least 30 minutes. This helps firm up the dough, making it easier to roll into perfect balls and keeping them from spreading too much in the oven.
Perfect Your Roll
When it comes to rolling the dough in sugar, aim for an even coat—too light, and you’ll miss that lovely sweetness; too heavy, and your peanut butter blossoms may be overly sugary. A light, even dusting will give the cookies a beautiful finish.
Timing is Key
Be mindful of your baking time. Peanut butter blossoms should be lightly golden at the edges but soft in the center when you take them out. They will continue to firm up on the baking sheet as they cool.
Adding the Kisses
Place the chocolate kisses in the center of the cookies immediately after they come out of the oven. This way, the chocolates melt ever so slightly, making them easier to press down.
With these tips in your back pocket, your peanut butter blossoms will be a hit at any gathering, offering that perfect blend of chewy, soft, and irresistibly delicious.

Serving Suggestions for Peanut Butter Blossoms
Peanut butter blossoms are a classic treat that brings back the nostalgia of childhood baking adventures. To elevate your cookie experience, consider these delightful serving suggestions that will make your homemade peanut butter blossoms even more enjoyable.
Ideal Pairings
- Milk or Coffee: Nothing beats the classic combo of peanut butter blossoms with a glass of cold milk or a steaming mug of coffee. The creamy richness of peanut butter complements the texture of milk, while coffee adds a lovely contrast.
- Ice Cream Sandwich: For a fun twist, sandwich a peanut butter blossom between two scoops of your favorite ice cream. Chocolate or vanilla ice cream pairs beautifully with the cookie’s flavors, making for a tasty dessert that impresses.
Presentation Tips
- Cookie Platter: Arrange your warm peanut butter blossoms on a colorful platter with some fresh fruit or chocolate-dipped strawberries to add a pop of color and freshness.
- Holiday Gift: Package a dozen of these cookies in a decorative tin or box as a thoughtful homemade gift for friends or family during the holidays.
With these suggestions, you’ll create not just cookies, but memories!
Time Breakdown for Peanut Butter Blossoms
Creating the perfect Peanut Butter Blossoms involves a little planning, but the time you invest will yield delicious rewards. Here’s a handy breakdown of the time you’ll need for each part of the process.
Preparation Time
Start with about 15 minutes to gather your ingredients and mix the buttery, peanut-smoky dough. It’s the moment when the anticipation builds, and you can already imagine how good your cookies will be!
Chilling Time
Let the cookie dough chill for at least 30 minutes. This step is crucial—it helps the cookies maintain their shape while baking, so resist the urge to skip it!
Baking Time
Once your dough is ready, popping those beauties in the oven will take about 10-12 minutes. Keep an eye on them; you want that perfect golden edge!
Total Time
With preparation, chilling, and baking, you’re looking at around 1 hour total. It’s a bit of a wait, but trust me, this time is well spent for those melt-in-your-mouth cookies.
Nutritional Facts for Peanut Butter Blossoms
When it comes to the delightful world of peanut butter blossoms, understanding their nutritional breakdown can enhance your cookie experience. These delightful treats, with their chocolate kiss centers, aren’t just delicious but also provide some essential nutrients.
Calories
Each peanut butter blossom contains approximately 90 calories. This makes them a sweet but manageable indulgence, especially when you’re sharing with friends or family.
Protein
Packed with protein, each cookie offers about 2.5 grams. The peanut butter is a great source of plant-based protein, making these cookies not only tasty but satisfying too!
Carbohydrates
With around 10.5 grams of carbohydrates per cookie, peanut butter blossoms strike the right balance for a sweet bite without sending your blood sugar soaring. They’re perfect for a quick energy boost when you need it!
Now that you know the nutritional insights behind these beloved cookies, why not whip up a batch and enjoy them with confidence?
FAQ About Peanut Butter Blossoms
Peanut Butter Blossoms are an irresistible treat that combines the rich, nutty flavors of peanut butter with delightful chocolate delights perched on top. It’s a nostalgic cookie that many of us associate with childhood baking, family gatherings, or simply enjoying a sweet moment alone with a warm cookie and a glass of milk. As you whip up these delicious cookies, you might find yourself pondering a few burning questions. Here’s a friendly guide to help you navigate your baking experience!
What is the best method to store Peanut Butter Blossoms?
To keep your Peanut Butter Blossoms fresh, store them in an airtight container at room temperature. They typically stay delightful for about 3-5 days. If you want to extend their deliciousness a bit longer, you can refrigerate them for up to two weeks. Just be sure to separate layers of cookies with parchment paper to avoid sticking!
Can I make these cookies gluten-free?
Absolutely! If you’re looking to enjoy Peanut Butter Blossoms without the gluten, simply substitute the all-purpose flour with a 1:1 gluten-free flour blend. Many brands have come up with fantastic blends that work well in cookies, ensuring you won’t miss out on the flavor or texture.
How can I achieve a perfect texture for my cookies?
Achieving that perfect chewy texture in your Peanut Butter Blossoms involves a few secrets. Make sure not to overmix your dough, as this can create a dense cookie. Also, chilling the dough for at least 30 minutes before baking allows the flavors to meld and leads to a fluffier result. Lastly, don’t forget to slightly underbake them; they’ll continue to cook on the baking sheet even after you take them out of the oven!
With these tips and tricks in mind, you’re well on your way to baking those scrumptious, nostalgic Peanut Butter Blossoms that everyone will love!
Conclusion on Peanut Butter Blossoms
The joy of baking peanut butter blossoms is always worth the effort, bringing together the wholesome richness of peanut butter and the sweet surprise of chocolate. These delightful cookies create a warm and inviting atmosphere, perfect for sharing during gatherings or treating yourself on a quiet evening at home. As you try this recipe, remember it’s not just about the cookies; it’s about creating memories with family and friends. So whip up a batch, savor the process, and relish each bite of these lovely treats. They’re sure to become a cherished addition to your dessert repertoire!
Print
Peanut Butter Kisses Cookies
- Total Time: 40 minutes
- Yield: 24 cookies 1x
- Diet: Vegetarian
Description
Delicious peanut butter cookies topped with chocolate kisses, perfect for any occasion.
Ingredients
Scale
- 1 ½ cups (180g) all purpose flour
- 1 teaspoon baking soda
- ½ teaspoon salt
- ½ cup (113g) unsalted butter (1 stick, at room temp)
- ¼ cup (50g) granulated sugar
- ½ cup (100g) brown sugar
- 1 large egg (at room temp)
- ½ cup (140g) creamy peanut butter
- 1 teaspoon pure vanilla extract
- 30 Hershey’s milk chocolate kisses (unwrapped)
Instructions
- In a bowl, combine the dry ingredients (flour, baking soda, and salt), set aside.
- In a large bowl, using a hand or stand mixer, cream the butter for 1 minute. Add the sugars and beat for 1 minute. Scrape off the sides of the bowl with a spatula.
- Add the egg, peanut butter, and vanilla, and beat until well combined.
- Add the dry ingredients to the wet ingredients, and mix until just combined. Cover with plastic wrap, and chill in the fridge for 30 minutes or overnight.
- Preheat oven to 350°F/180°C.
- Line baking 2 baking sheets with parchment paper, and set aside.
- Divide the cookie dough into 1 tablespoon dough balls (use a small cookie scoop, or scales). Gently roll ball in granulated sugar to coat from all sides, and arrange on the baking sheets 2 inches apart.
- Bake for 10 minutes the cookies will puff up and have cracked tops, remove from the oven and cool for 5-10 minutes (if you add the chocolates right away they will melt, so it’s recommended that you cool the cookies a little first, but not for too long as you don’t want them to set completely).
- Press a chocolate kiss candy in the center of each cookie, and remove onto a cooling rack. If it’s very warm where you are working, then you can place the cookies in the freezer for 10 minutes – this will prevent the chocolate from melting.
Notes
- Chilling the dough for longer will enhance the flavor and texture.
- Try using different candy toppings for variety.
- Prep Time: 30 minutes
- Cook Time: 10 minutes
- Category: Dessert
- Method: Baking
- Cuisine: American
Nutrition
- Serving Size: 1 cookie
- Calories: 120
- Sugar: 8g
- Sodium: 85mg
- Fat: 6g
- Saturated Fat: 3g
- Unsaturated Fat: 2g
- Trans Fat: 0g
- Carbohydrates: 14g
- Fiber: 1g
- Protein: 2g
- Cholesterol: 20mg